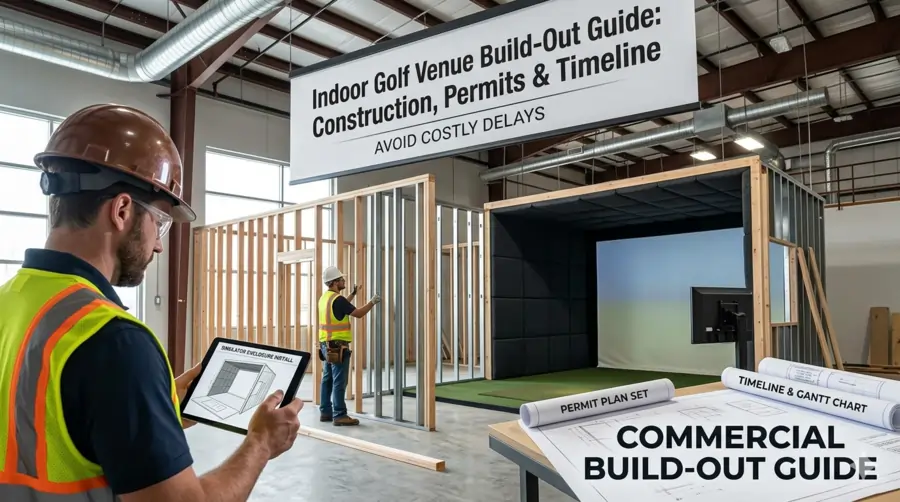
Most golf simulator venue projects run 30 to 50 percent over original budget and open two to four months later than planned. The cause is almost always the same: operators underestimate the complexity of commercial build-out before they sign a lease. This guide walks you through every construction phase, the permit stack you actually need, and a realistic week-by-week timeline from lease execution to opening day.
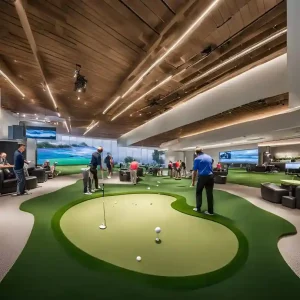
Space Requirements and Bay Layout
The build-out conversation starts before you ever talk to a contractor. Every downstream construction decision traces back to whether your raw space can physically support commercial simulator bays. Get this wrong and no amount of renovation budget saves you.
Ceiling Height: The Single Biggest Dealbreaker
Standard retail ceilings run 8 to 9 feet. That is not enough for a full golf swing. The minimum workable ceiling for a commercial simulator bay is 12 feet of clear, unobstructed height. Fourteen feet is better, and experienced operators consistently recommend targeting it wherever the lease makes it possible. Warehouse conversions, industrial flex spaces, and second-generation fitness locations are popular specifically because they tend to hit this number.
Unobstructed is the critical word. Measure from the finished floor to the lowest fixed obstruction in the swing zone, which means HVAC ductwork, sprinkler heads, structural beams, conduit, and lighting fixtures all count against your clearance. A space that shows 14 feet on a floor plan may deliver 11.5 feet of usable swing height once mechanical systems are routed. Walk the ceiling with your HVAC and electrical contractors before you commit to a lease, not after.
Bay Footprint by Technology Type
Radar-based launch monitors and camera-based systems have fundamentally different depth requirements, and mixing up the two is an expensive mistake during space planning. A photometric system like the Foresight GCQuad or GC3 typically needs 10 feet from the hitting position to the impact screen. A radar unit like TrackMan requires up to 21 feet of depth from the launch monitor to the screen because the Doppler technology needs distance to build a complete ball flight arc. If your space is tight on depth, that technology distinction is not a minor detail.
| Dimension | Minimum (Commercial) | Recommended | Notes |
|---|---|---|---|
| Bay Width | 14 ft | 15–18 ft | Wider allows both left- and right-handed play without repositioning |
| Bay Depth (photometric) | 16 ft | 18–20 ft | Includes hitting area, screen, and rear safety buffer |
| Bay Depth (radar) | 22 ft | 25 ft | TrackMan and similar Doppler units need full ball flight distance |
| Ceiling Height | 12 ft | 14 ft+ | Measure to lowest fixed obstruction, not to roof deck |
| Overall Sq Ft (4-bay venue) | 2,500 sq ft | 3,500–5,000 sq ft | Includes lounge, reception, restrooms, and storage |
Related Resource
Ready to take the next step?
Our complete guide walks you through every phase of opening an indoor golf simulator business — from validating your market and choosing a location to equipment, insurance, pricing, and your first 90 days of operations.
Starting a Golf Simulator Business →Lounge and Common Area Planning
The simulator bays generate the booking revenue. The lounge generates the per-visit spend. Average food and beverage revenue at a well-run golf sim venue runs $20 to $35 per person per session. That number does not happen without allocating enough square footage to create an actual social space where non-golfers in a group are comfortable. Budget at minimum 600 to 800 square feet for lounge seating, a bar or service area, and reception beyond your bay count. Venues that squeeze every square foot into hitting bays leave significant revenue per head on the floor.
Structural columns are the most common space planning surprise in warehouse and retail conversions. A column placed at 15-foot intervals may not appear problematic on a floor plan, but it can force a bay to either shrink width or shift alignment in ways that affect tracking accuracy. Identify column locations before finalizing your bay count and layout.
The Six Build-Out Phases
Commercial simulator venue construction follows a predictable sequence. Phases overlap, but the order matters. Starting finish work before rough-in inspections are signed off is how projects earn stop-work orders and restart delays.
Design, Permitting, and Contractor Selection
This is the phase most operators mentally skip over because it feels like pre-construction overhead. It is actually the phase that determines your entire timeline. Before a single wall moves, you need architectural drawings approved by your local building department, a general contractor with commercial tenant improvement experience, and a clear mechanical, electrical, and plumbing (MEP) plan from licensed subcontractors.
Permit approval timelines vary significantly by jurisdiction, from two weeks in fast-track municipalities to eight to twelve weeks in major metros with high permit volume. Start the permit application process the day your lease is executed, not when you feel ready to break ground. That gap is where timelines slip.
Demolition and Structural Prep
Existing tenant improvements, partition walls, dropped ceilings, and any mechanical systems that intrude into your swing zones come out in this phase. For spaces with inadequate ceiling height, this is also where reconfiguration work happens. Removing a drop ceiling to gain 18 inches of clearance is common and cost-effective. Structural modifications to the building shell, like raising a roofline or removing load-bearing elements, require engineering sign-off and typically a separate structural permit.
Asbestos and lead paint surveys are required in most commercial spaces built before 1980. If abatement is needed, budget $5,000 to $20,000 and two to four additional weeks before other trades can enter the space.
Rough-In: Electrical, Plumbing, HVAC
This is the highest-stakes phase of the build. Every system that goes inside walls and ceilings gets installed here, inspected, and approved before the walls close. Mistakes made in rough-in are the most expensive to fix because they require reopening finished surfaces. Work with your simulator equipment vendor on electrical placement before rough-in begins, not after. Projector power, launch monitor circuits, and AV infrastructure all have specific placement requirements that affect where your electrician runs conduit.
Framing, Insulation, and Drywall
Bay partitions, the back wall behind the screen, and any sound isolation walls go up in this phase. Bay partition walls are structural elements, not just visual dividers. They take repeated ball impact vibration over time, particularly at the screen end, and should be framed to commercial tolerances with blocking in the screen mounting zone. Acoustic insulation in partition walls and above the ceiling plane is significantly cheaper to install here than it is to retrofit after opening.
Finish Work: Flooring, Ceilings, Lighting, Paint
Flooring selection in the hitting area is a functional decision before it is an aesthetic one. Rubber-backed luxury vinyl tile or poured rubber flooring handles the repeated foot traffic and mat placement better than hardwood or polished concrete, which can shift mats under repeated use. The lounge area is where your flooring aesthetic does the most brand work. Separate the two zones with material transitions rather than trying to run one surface through both.
Lighting in the hitting bays requires particular attention. Certain launch monitor systems are sensitive to strong overhead light sources that create glare on the impact screen or interfere with camera-based tracking. Your simulator vendor should specify lighting placement and color temperature as part of the bay design package.
Simulator Installation, AV, and Final Inspections
Equipment arrives and gets installed only after the space passes rough-in and framing inspections. Most commercial simulator installations take one to three weeks for a four-to-six bay venue, depending on system complexity and the number of installation crews on site. This phase runs concurrently with final AV installation, network cabling, POS system setup, and signage. At the end of this phase, you walk through the certificate of occupancy inspection. No CO, no customers.
The permit process is not a formality. A stop-work order issued mid-build adds weeks to your timeline, fines to your budget, and contractor availability problems you cannot easily solve.
Commercial Build-Out RealityPermits and Approvals You Need
The permit stack for a golf simulator venue build-out is more involved than most operators anticipate coming from a residential renovation background. Here is the complete list of what a typical commercial tenant improvement project requires.
Building Permit (Tenant Improvement)
Any modification to the interior of a commercial space, including partition walls, electrical work, plumbing, and HVAC changes, requires a building permit in virtually every U.S. jurisdiction. The permit application requires architectural drawings stamped by a licensed architect or engineer, a complete MEP plan, and a detailed description of the scope of work. In most cities, this is the permit with the longest approval lead time. Submit the application the day your lease is signed.
Certificate of Occupancy
A certificate of occupancy (CO) authorizes you to legally open your business in the space. If you are taking over a space with a different prior use, changing occupancy classification, or making significant structural modifications, a new CO is required. You cannot open to the public without it. The CO is issued after all final inspections are passed, which means every permit associated with the build must be closed out first.
Fire Marshal Inspection
The fire marshal reviews egress routes, exit signage, fire suppression system coverage, extinguisher placement, and occupancy load. Indoor golf venues fall under assembly occupancy classifications in most jurisdictions, which carry higher code requirements for egress width and suppression coverage than standard retail. Confirm your occupancy classification with the local building department early. Reclassification late in a build can require changes to exit configurations that are expensive to retrofit.
Small municipality or suburban market: 2 to 4 weeks for building permit approval. Mid-size city: 4 to 8 weeks. Major metro (NYC, LA, Chicago, Seattle): 8 to 16 weeks or longer. Always verify locally. Some jurisdictions offer expedited review for an additional fee, which is almost always worth it on a commercial timeline.
Business License
Filed separately from building permits, a business license is required to legally operate a commercial business in your municipality. Processing time is typically one to two weeks, but some jurisdictions tie the business license issuance to the certificate of occupancy. File early so you are not waiting on this at the end.
Liquor License (If Applicable)
If you plan to serve alcohol, the liquor license application should be filed in parallel with your building permit, not after opening. State and local alcohol approval timelines run 30 to 120 days depending on jurisdiction. Some operators open on a BYOB policy while the license is pending. Given that food and beverage can represent 20 to 30 percent of total venue revenue, deferring the liquor license application is an expensive decision.
Health Department Permit (If Serving Food)
Prepared food service triggers health department review and a separate permit. The requirements depend on what you are serving. A full kitchen with cooking equipment faces a substantially more complex inspection than a service bar with packaged snacks and limited prep. Confirm the threshold with your local health department before finalizing the F&B concept, as it affects both construction scope and permit cost.
Signage Permit
Exterior signage almost always requires a separate permit from the local zoning or planning department. In shopping center locations, tenant signage is also subject to the landlord’s sign criteria, which may limit size, illumination type, and placement options. Negotiate sign rights in the lease before executing, not after.
| Permit | Typical Lead Time | Filed By | Notes |
|---|---|---|---|
| Building / TI Permit | 2–16 weeks | GC or architect | Longest lead time; file day one |
| Certificate of Occupancy | 1–2 weeks after final inspection | GC | Required before opening to public |
| Fire Marshal | 1–3 weeks | GC | Triggered by building permit final |
| Business License | 1–2 weeks | Owner | File early; some tie to CO issuance |
| Liquor License | 30–120 days | Owner | File in parallel with building permit |
| Health Dept Permit | 2–6 weeks | Owner | Triggered by food service scope |
| Signage Permit | 2–4 weeks | Sign vendor / owner | Also subject to landlord criteria |
Electrical, HVAC, and Networking
These three systems are where most build-out budget surprises live. They are also the systems that most directly affect the performance of your simulator technology.
Electrical Load Planning
Each simulator bay requires dedicated electrical circuits. A typical commercial bay setup running a projector, launch monitor, desktop computer, and associated AV equipment draws between 15 and 20 amps at 120V under load. If you add lighting, a TV monitor, and any motorized components, that number climbs. Plan dedicated 20-amp circuits per bay minimum, with a separate circuit for overhead lighting so bay lighting does not share capacity with equipment.
A four-bay venue with a bar, POS terminals, kitchen equipment, HVAC, and lighting will likely require a 200 to 400-amp service depending on F&B scope. If the existing building service does not support that load, utility upgrade costs, including transformer fees and new service entrance equipment, run $5,000 to $25,000 and require coordination with the utility company, adding four to twelve weeks to your timeline in some markets.
HVAC Sizing and Placement
Golf simulator venues generate significant heat load. A full hitting bay with active players, a running projector, and desktop computing equipment generates more BTUs per square foot than a standard retail space. Undersized HVAC creates an uncomfortable playing environment that drives customers out early and suppresses per-session revenue.
The critical placement issue is ductwork routing through the ceiling. Ductwork that crosses the hitting zone reduces effective ceiling clearance and creates interference issues for ceiling-mounted launch monitors or projectors. Require your HVAC contractor to show duct routing on the coordinated ceiling plan before rough-in begins. Rerouting ductwork after framing is done costs significantly more than planning it correctly upfront.
Network Infrastructure
Every simulator bay needs a wired ethernet connection and reliable WiFi coverage. Hard-wire the bays rather than relying on WiFi alone. Simulator software, booking systems, and any networked leaderboard or multiplayer features all benefit from the reliability of a wired connection. A managed network switch with VLAN capability lets you separate customer WiFi from operational systems, which matters for POS security compliance.
ADA compliance is required for commercial public accommodations. At minimum, one simulator bay should be accessible to wheelchair users, which affects bay width (typically 18 feet or more), mat height, and the path of travel from the entrance. Restrooms must meet ADA requirements on fixture count, turning radius, and grab bar placement. Flooring transitions between zones cannot exceed a half-inch vertical rise without a beveled reducer. Build these requirements into your design drawings, not as an afterthought at the fire marshal inspection.
Flooring, Acoustics, and Finishing
Flooring Selection by Zone
The hitting bay floor has one job: hold the hitting mat in place under repeated lateral force and foot traffic. Rubber-backed LVT or commercial rubber tile is the preferred choice for most operators. Polished concrete looks sharp but creates mat slippage issues that players notice immediately. Hardwood is aesthetically appealing in the lounge but impractical in the hitting area. Use the material transition as a natural zone separator and budget approximately $6 to $15 per square foot installed for the hitting bay floor depending on material.
Acoustic Treatment
Impact noise from ball strikes on the screen, swing sounds, and general player activity in adjacent bays bleeds between partitions more than most operators anticipate. Acoustic isolation between bays is significantly cheaper to build in during construction than it is to retrofit with post-opening add-ons. Standard solutions include batt insulation in partition wall cavities, acoustic ceiling tile above the playing area, and mass-loaded vinyl barriers on shared walls. Budget $2,000 to $5,000 per bay for a baseline acoustic treatment package.
Impact Surfaces and Wall Protection
The rear wall behind the impact screen takes repeated ball strikes over tens of thousands of sessions. Commercial-grade impact panels or rubber-backed netting on the back wall extends the life of the screen assembly significantly. Side walls within the swing arc also need protection. Golf balls deflected off equipment or errant shots at speed can damage standard drywall quickly. Rubber paneling or dense foam padding on the swing-zone side walls is standard practice in well-built venues.
How Your Build-Out Decisions Affect Your Insurance
The build-out choices you make have a direct effect on the insurance program you need and what you will pay for it. Indoor golf venues operate in a commercial occupancy category with a specific risk profile, and insurers underwrite that profile based on what is actually inside your facility. See more about golf simulator venue insurance requirements.
A venue that serves alcohol faces liquor liability exposure that a dry venue does not. A venue with a commercial kitchen carries different property and liability requirements than one with packaged snacks only. The number of simulator bays, square footage, total property value of equipment installed, and whether you employ staff or operate unattended all feed into how a policy is structured and priced.
The build-out phase is also when you accumulate significant uninsured exposure if you are not careful. Equipment arriving on site before installation, leasehold improvements in progress, and tenant-owned improvements that your landlord’s policy does not cover all represent gaps that should be addressed before construction begins. Work with an insurance specialist who understands the indoor golf and entertainment venue space, not a generalist who has never underwritten a simulator facility.
Golf Simulator Business Insurance
Get coverage designed specifically for indoor golf and simulator venues, from build-out through opening day and beyond. Connect with a specialist who understands this business.
Explore Coverage OptionsWeek-by-Week Build-Out Timeline
The timeline below reflects a four to six-bay venue in a commercial tenant improvement scenario with no major structural surprises and permit approval in the four to six week range. Simpler markets run faster. Major metros with slow permit queues and liquor license timelines will stretch this by six to twelve weeks.
| Weeks | Phase | Key Milestones |
|---|---|---|
| Weeks 1–2 | Lease Execution + Pre-Construction | Hire architect, begin drawings, file building permit application, select GC, order simulator equipment (lead times run 4–12 weeks) |
| Weeks 3–6 | Permit Review Period | Respond to plan check comments, finalize MEP drawings, execute GC contract, file liquor license application, begin contractor scheduling |
| Weeks 7–8 | Demolition + Site Prep | Permit in hand, mobilize GC, demolition of existing improvements, abatement if required, site prep for rough-in |
| Weeks 9–12 | Rough-In (Electrical, HVAC, Plumbing) | All MEP rough-in, rough-in inspections, utility service upgrade if required, low-voltage and data conduit run |
| Weeks 13–15 | Framing, Insulation, Drywall | Bay partitions framed, acoustic insulation installed, drywall hung and taped, screen mounting blocking installed |
| Weeks 16–18 | Finish Work | Flooring, paint, ceiling tile, lighting fixtures, millwork, bar buildout, restroom fixtures, signage installation |
| Weeks 19–20 | Simulator Installation + AV | Equipment delivery and installation, projector mount and calibration, network setup, POS installation, final AV |
| Weeks 21–22 | Final Inspections + CO | Fire marshal inspection, building final inspection, CO issuance, staff training, soft open |
Commercial simulator systems from TrackMan, Foresight Sports, Full Swing, and Golfzon carry lead times of four to twelve weeks from order to delivery. Order equipment the day your lease is signed, not when construction is nearly done. Delayed equipment delivery is one of the most common causes of a completed build sitting dark for weeks past the original opening target.
The Mistakes That Blow Timelines and Budgets
These are the patterns that separate operators who open on time from those who do not.
Signing a Lease Before Confirming Ceiling Height
A 10-foot ceiling looks like enough clearance until you account for ductwork, sprinkler heads, and lighting. Do not sign a lease without physically measuring the minimum ceiling height in the specific zones where bays will sit, with a contractor present who understands what mechanical systems will be routed through that ceiling. The cost of a ceiling height problem discovered after lease execution ranges from expensive to fatal for the project.
Underestimating the TI Allowance Negotiation
Tenant improvement allowances are a standard part of commercial lease negotiations, and landlords routinely offer them to attract quality tenants. A realistic build-out for a well-finished four-bay venue runs $100,000 to $200,000 before equipment. A negotiated TI allowance of $30 to $60 per square foot meaningfully changes your out-of-pocket capital requirement. This negotiation happens before you execute the lease, never after. It is the highest-leverage conversation in the entire startup process.
Starting Construction Before Permits Are Approved
The temptation to begin demo or framing while waiting on permit approval is understandable when you are paying rent on a space that is not generating revenue. It is also how projects earn stop-work orders. Unpermitted work discovered during an inspection can require removal and reinstallation of completed improvements, at your cost. The time and money saved by starting early is a fraction of the cost of a stop-work order and forced rework.
Buying Equipment Before Confirming Space Dimensions
Simulator systems are sold with specific space requirements. Purchasing a radar-based system for a space that can only support 18 feet of depth is a problem that no amount of creative installation solves. Confirm final, measured bay dimensions with your contractor before placing equipment orders. Floor plans lie. Tape measures do not.
Not Coordinating the Equipment Vendor with Your GC
Your simulator equipment vendor has specific requirements for electrical placement, projector mounting height, screen wall blocking, and floor preparation. These requirements must be communicated to your general contractor before rough-in begins. The most common version of this mistake is an electrician running conduit to the wrong location because the GC did not have the equipment installation drawings. That mistake costs one to two weeks and several thousand dollars to correct.
A realistic timeline from lease execution to opening day for a four to six-bay venue is 18 to 22 weeks in most markets, longer in major metros with slow permit pipelines or complex liquor license jurisdictions. Build-out costs run $50,000 to $200,000 depending on space condition, finish level, and F&B scope. The operators who open on time and on budget treat permitting as a day-one task, order equipment the week the lease is signed, and use the TI allowance negotiation as a capital efficiency tool before committing to the space.
The Indoor Golf Business Study and Startup Financial Model
See how your build-out budget, bay count, and pricing structure translate into real break-even numbers. Includes a player preferences guide with data on what golfers actually want from a simulator venue.
Get the Financial ModelThe Golf Simulator Insurance Program is offered through CoverMyNiche, LLC, a licensed insurance wholesaler. Neither Yardstick Golf nor [Sub-Partner] is a licensed insurance producer, and neither is authorized to sell, solicit, or bind insurance. I/we may receive a referral fee if you purchase coverage through this link.