Here’s a scenario I’ve seen play out in dozens of simulator builds: someone spends weeks sourcing the right impact screen, builds a clean 10 × 10-foot enclosure, mounts their projector — and then flips it on to find a widescreen image that blasts past the bottom of the screen and bleeds onto the floor. Or worse, they just leave massive black bars on both sides and call it “good enough.”
It’s not good enough. And it’s 100% fixable with a little math and about 20 minutes of software calibration. That’s what this guide is for. We’re going to work through aspect ratios, throw ratios, custom PC resolutions, and software alignment inside GSPro and E6 Connect — so you know how to fill your golf simulator screen, edge to edge, with zero compromise on image quality.
No guesswork. Just clean math and a clear process.
The Core Problem: Your Enclosure and Your Projector Speak Different Languages
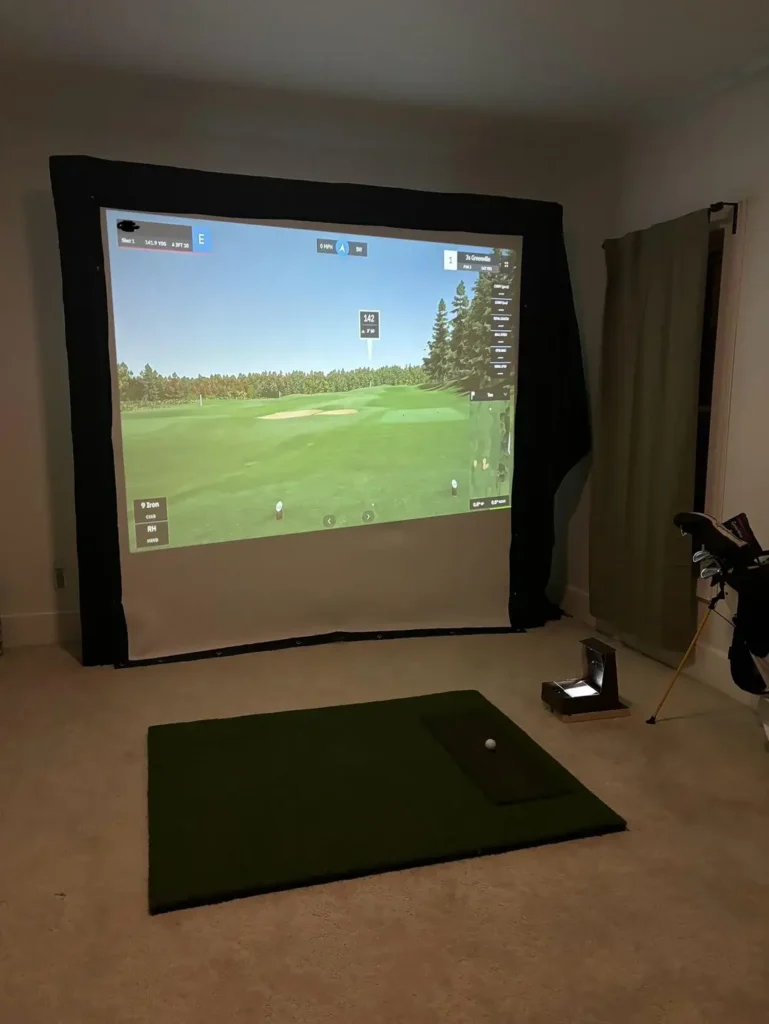
The root of the issue is simple. Most golf sim enclosures are built around practical constraints — ceiling height, garage width, whatever fits. That usually produces a screen that’s roughly square or slightly wider than it is tall. But consumer projectors are almost universally designed to output a 16:9 aspect ratio, because that’s what TVs and monitors use.
When you force a 16:9 signal onto a 10 × 10 screen, the math doesn’t work. The projector either stretches the image to fill the frame (everything looks distorted), clips the top and bottom (you lose part of the image), or it letterboxes with black bars on two sides. None of those outcomes are acceptable when you’re trying to read a realistic ball flight across 300 yards of virtual fairway.
The fix starts with knowing your screen’s aspect ratio — and then making the projector and simulation software match it precisely.
The Math of Ratios: Use the Decimal Method
Forget memorizing ratio names. The easiest way to handle this is with what I call the Decimal Method. One formula. Works for any screen size.
Formula: Width ÷ Height = Decimal Ratio > Example: 10 ft wide ÷ 8 ft tall = 1.25
Once you have your decimal, match it to the closest standard ratio. That tells you exactly what signal to feed the projector and how to configure your software resolution. Pro Tip: check out projector central for throw and aspect ratios.
Common Decimal Ratios and Their Standard Names
| Decimal Ratio | Standard Ratio Name | Closest Native Resolution | Notes |
| 1.00 | 1:1 (Square) | Custom only | Common in compact cube-style builds |
| 1.25 | 5:4 (Close to 4:3) | Custom only | 10×8 enclosures land here |
| 1.33 | 4:3 | 1024×768 / 1400×1050 | 12×9 enclosures — very common in garages |
| 1.60 | 16:10 | 1920×1200 / 1280×800 | 16×10 or 12×7.5 screens — great compromise |
| 1.78 | 16:9 | 1920×1080 / 4K UHD | True widescreen — works if your ceiling allows it |
Quick-Reference: Matching Common Enclosure Sizes to Ratios
| Enclosure Width × Height | Decimal Ratio | Best Matching Ratio | Recommended PC Resolution |
| 10 ft × 10 ft | 1.00 | 1:1 (Square) | Custom: 1080×1080 or 1440×1440 |
| 10 ft × 8 ft | 1.25 | 5:4 (Custom) | Custom: 1350×1080 |
| 12 ft × 9 ft | 1.33 | 4:3 | Custom: 1440×1080 or 1920×1440 |
| 12 ft × 7.5 ft | 1.60 | 16:10 | 1920×1200 |
| 14 ft × 8 ft | 1.75 | Close to 16:9 | Custom: 1890×1080 |
| 16 ft × 9 ft | 1.78 | 16:9 (Native) | 1920×1080 / 3840×2160 |
Projector Native Resolution vs. Custom Resolution
Every projector has a Native Resolution. That’s the physical pixel grid on the chip inside. If you send a natively 16:9 projector a 1920×1080 signal to a square screen, you’ll have massive spill.
The alternative is setting a Custom Resolution on your PC. This tells your GPU to only use the pixels that align with your screen’s shape.
Check out our recommended golf simulator projectors.
How to Create a Custom Resolution (NVIDIA)
- Right-click desktop → NVIDIA Control Panel → Change Resolution.
- Click Customize… → Create Custom Resolution.
- Enter your target width and height (e.g., 1440 x 1080 for a 4:3 screen).
- Hit Test, then Apply. Your desktop will now match your enclosure’s shape.
The Throw Ratio Equation: Projector Placement
Before bolting anything down, calculate your distance:
Throw Distance = Throw Ratio × Screen Width
If your projector has a 0.50 throw ratio and your screen is 10 ft wide, your lens must be exactly 5 feet from the screen.
Shadow Management: The 1–3 Foot Rule
The golfer stands between the projector and the screen. If the lens is directly overhead, you’ll see a massive shadow on your target line.
- Mount Height: Position the lens 12–18 inches above your head (usually 7.5′ to 8.5′).
- Horizontal Offset: Mount the projector 1 to 3 feet behind the golfer’s head. This drops the shadow below your waist and out of your sightline while keeping the projector safe from high-lofted wedge strikes.
Software Calibration: Finalizing the Look
Once your PC is outputting the right resolution, you need to tell your golf software to use it.
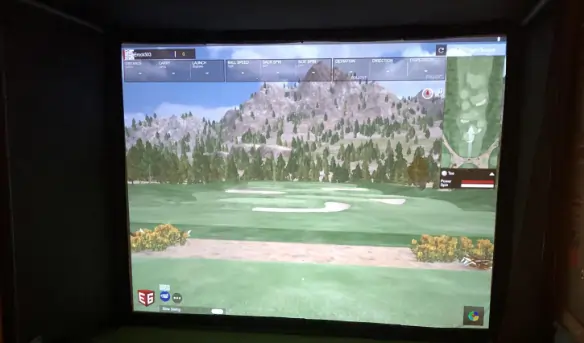
1. GSPro Settings
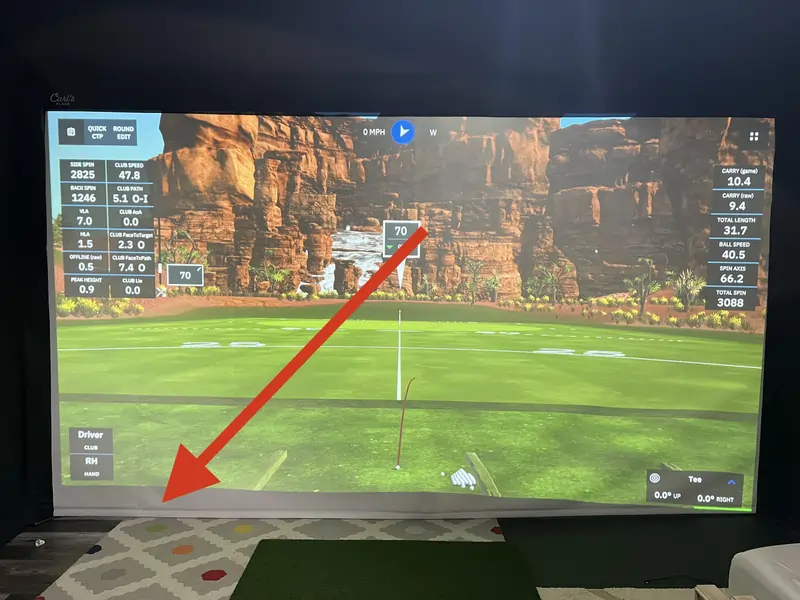
Open the GSPro launcher. Select your Custom Resolution (e.g., 1440×1080) from the dropdown. If you don’t see it, ensure your Windows desktop is currently set to that resolution. This ensures the “Mini-Map” and “Ball Data” UI elements aren’t cut off or floating in the middle of the screen.
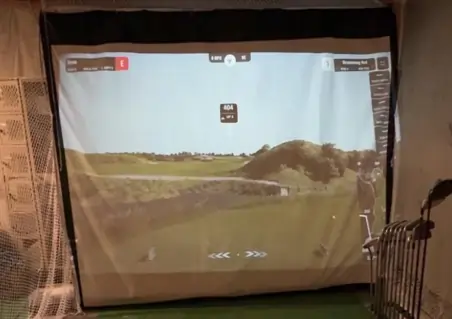
2. E6 Connect Alignment
In E6 Connect, navigate to Settings > Simulator > Screen Calibration. Use the “Four Corner” adjustment tool to pull the edges of the software image exactly to the corners of your enclosure. This fixes minor physical misalignments without having to climb back up a ladder.
3. Avoid “Keystone” Correction
Try to perfectly level your projector physically. Using the digital Keystone setting in your projector menu to square the image actually turns off rows of pixels, making your expensive sim look fuzzy and pixelated. Lens Shift is always better than Keystone.
The Simulation Cheat Sheet
| If Your Screen Is: | Use This Resolution: | Software Aspect: |
| Square (10×10) | 1080 x 1080 | 1:1 |
| Standard (12×9) | 1440 x 1080 | 4:3 |
| Widescreen (16×9) | 1920 x 1080 | 16:9 |
By matching your pixels to your fabric, you eliminate the “distraction factor.” You aren’t playing a video game on a wall; you’re looking through a window onto the first tee.
Ready to start your build? Check out our guide on the best golf simulator enclosures to ensure your new 4K image looks as sharp as the math suggests.