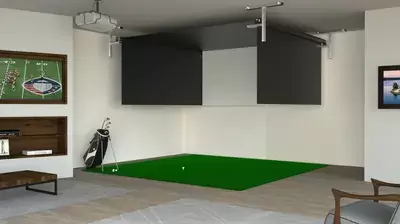
You’re not buying a toy. You’re hanging a ballistic fabric wall in front of drywall, windows, and people you care about. If the enclosure is wrong—too shallow, too loose, or too exposed—bounce‑back and shanks can turn your home sim into a hazard, not a haven.
How Deep, How Wide, How Safe?
The first decision is not brand. It’s space.
A proper golf simulator enclosure needs enough depth for the ball to hit the screen, decelerate, and drop before it can rebound back at you. Industry standard for a fixed frame is about 5 feet of enclosure depth. That’s not marketing fluff; it’s physics. At typical indoor ball speeds, a 5‑foot cavity plus a correctly tensioned impact screen gives the ball room to deform the fabric, bleed off energy, and fall harmlessly to the floor instead of rocketing back at your face.
On top of depth, you need buffer on all sides for shanks and high flares. Bare drywall three inches outside your screen is a bad idea. Black side curtains and a ceiling panel are not cosmetic; they are shank protection and light control in one package.
Recommended Golf Simulator Enclosures
|
Enclosure |
Our Evaluation |
Key Facts |
Check Prices |
|---|---|---|---|
 |
Best Premium Enclosure |
||
 |
Best Retractable Enclosure |
||
 |
Best DIY Enclosure |
||
 |
Best Small Space |
Best High End Golf Simulator Enclosures
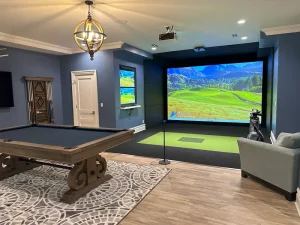
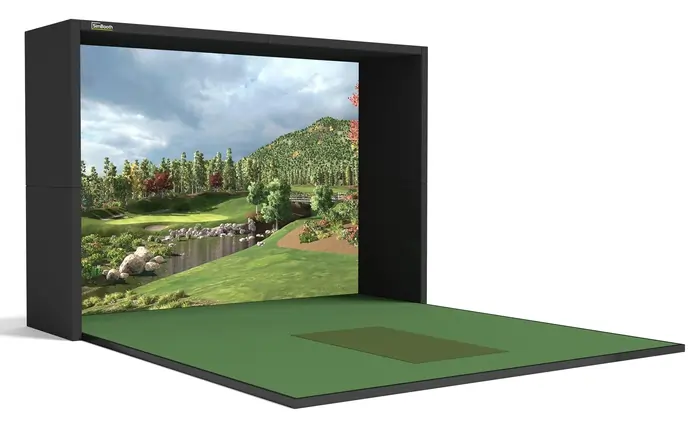
A premium golf simulator enclosure is built to feel like a permanent, professional installation rather than a temporary net in the corner of a room. It uses higher‑grade materials, better light control, and a cleaner finish to deliver a more immersive, theater‑like hitting environment. These enclosures are ideal if you want a polished look, quieter impact noise, and the durability to handle heavy year‑round use.
Carl’s Place Professional Enclosure
Carl’s Place Pro Enclosure feels a step above a typical home setup because it’s designed to recreate a commercial simulator bay in your own space. The heavy‑duty frame and tightly tailored enclosure fabric create a sturdy, squared‑up hitting area that doesn’t wobble or look “DIY.” That stability makes it easier to trust your swing, especially with driver, because you’re not worried about hitting posts or flimsy netting. It also gives the whole simulator a clean, finished look that matches the investment you’ve made in your launch monitor and projector.
The impact screen is where this enclosure really separates itself. A premium, tensioned screen stays flatter and shows fewer waves and puckers, which translates into a sharper, more immersive image. That makes ball flight easier to track and puts more realism into putting and short‑game visuals. It also helps with durability: you can hit ball after ball, including higher‑speed driver shots, without worrying that you’re going to stretch or blow out the screen in a season.
Another big advantage is how well the enclosure controls light and errant shots. The deep side and top panels, combined with dark, light‑absorbing fabric, cut down reflections and ambient light so your projected image pops instead of washing out. At the same time, the fully wrapped design catches the occasional thin, high, or off‑line shot, which matters a lot if you’re swinging freely in a shared space. That extra protection gives peace of mind when friends or less‑experienced golfers are using the simulator.
All of these details add up to an enclosure that not only looks more professional, but genuinely improves the day‑to‑day experience of using a golf simulator. It lets you swing harder with more confidence, delivers a brighter and clearer image, and turns a basic setup into a dedicated “sim bay” you actually want to spend hours in. That combination of polish, protection, and playability is why it stands out as a premium enclosure pick rather than just another frame and screen.
|
Pros
|
Cons
|
|---|---|
Runner Up Options for Professional Golf Sim Enclosures
Here are three other top‑of‑the‑line options worth a serious look for high‑end golf simulation.
Best Retractable Golf Simulator Enclosure
Retractable golf simulator enclosures let you turn almost any room into a hitting bay when you need it, then get your space back in seconds. With a screen that rolls or folds away, you can keep your garage, basement, or bonus room looking and functioning like normal while still enjoying a full‑size simulator experience whenever it’s tee time.
Sportscreen Vanish Retractable
The Sportscreen Vanish Retractable stands out as a premier choice for golf simulator enthusiasts because it’s built around everyday usability and long-term performance. Unlike fixed enclosures that dominate your space, the Vanish’s retractable design gives you instant flexibility—transforming your room from a dedicated simulator bay back into a living area or garage in seconds. For golfers balancing practice with shared household space, that smooth transition makes it far easier to integrate a professional setup into real life.
At the heart of its appeal is the seamless, motorized roll-up system. This is not just a convenience feature; it’s a major upgrade in durability and protection. The Vanish retracts neatly into an enclosed cassette, which shields the impact screen from dust, sunlight, and accidental damage—all factors that shorten screen lifespan in open systems. For golfers practicing year-round, that hidden protection means a sharper, cleaner hitting surface every time you play, with less need for costly replacements.
Another game-changing element is the zero floor or ceiling track design. This creates a true “vanishing” enclosure—nothing to trip over, bump into, or block your projector’s throw line. It also means perfect alignment every time you roll it down, ensuring consistent ball flight visuals and accurate simulator readings. Combined with the heavy-duty impact material that absorbs shots quietly and safely, it’s clear this setup caters to both performance and immersion.
Ultimately, the Sportscreen Vanish Retractable wins our pick for best retractable golf simulator enclosure because it understands the lifestyle behind the game. It delivers a premium, professional-quality experience without locking you into a single-purpose room, letting you practice, play, and then reclaim your space in moments. For serious simulator users who want flexibility without compromise, the Vanish truly lives up to its name.
|
Pros
|
Cons
|
|---|---|
Retractable Enclosure Runner Up
One more golf retractable golf simulator enclosure we think is worth considering
DIY Golf Simulator Enclosures
Building your own DIY golf simulator enclosure is one of the most rewarding upgrades you can make to your home golf setup. Instead of being locked into expensive, one-size-fits-all packages, you can tailor the size, materials, and layout to your space, budget, and playing style. With some basic planning and a few common tools, you can create a safe, professional-looking hitting bay that protects your walls, frames your projected image, and makes every session feel like a true indoor round. This guide walks through the key decisions—from framing and impact screens to netting, bungees, and blackout curtains—so you can design an enclosure that feels custom-built for your game.
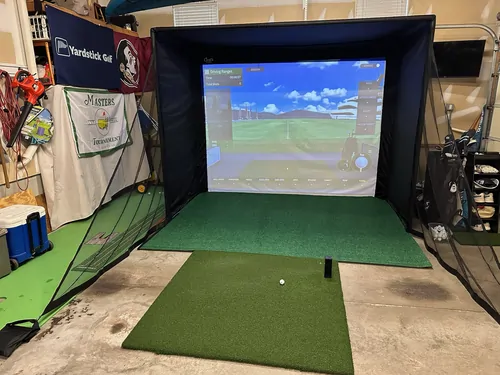
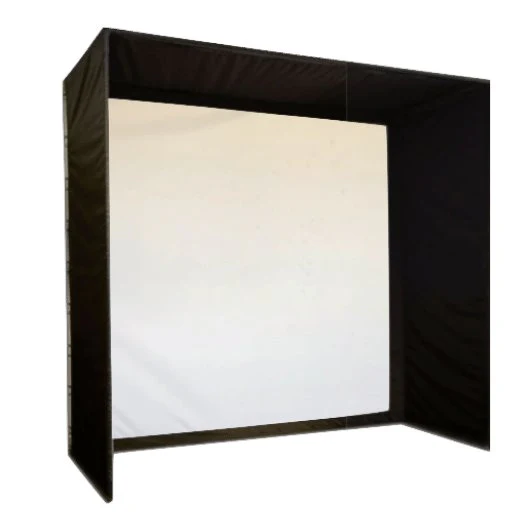
Carl’s Place DIY Enclosure
The Carl’s Place DIY Golf Simulator Enclosure wins as a DIY favorite because it delivers a truly custom bay without requiring pro installation or fabrication skills. Instead of forcing you into one fixed size, the kit uses off-the-shelf EMT pipe and supplied steel corner fittings, so you can tailor the frame to your room dimensions while still ending up with a clean, squared enclosure. For home golfers trying to maximize a basement, spare room, or garage, that flexibility makes it much easier to get a full-size hitting area and ideal screen size out of imperfect spaces.
The enclosure’s black nylon surround is more than just a backdrop; it creates a darkened “theater” that boosts image contrast and protects your walls from shanks and ricochets. By shading the screen and catching any offline shots, it helps your projected image pop while giving you the confidence to swing freely with drivers and wedges without worrying about damage around the bay. Add-on options like net wall extensions, foam inserts, and baffles further dial in safety and forgiveness, softening impacts near the frame and knocking down high wedge shots so you can practice your full bag indoors.
Where the Carl’s Place DIY enclosure really separates itself is at the screen and ball interaction level. The cabled, floor-to-turf impact screen design removes the bottom border, creating a seamless visual from your hitting mat into the image, which feels more like looking down a real fairway than at a floating rectangle on the wall. Releasable zip ties, ball bungees, and a bottom cable let you fine-tune screen tension to reduce bounceback and noise based on your swing speed and how close you stand, so you can tune the feel over time instead of living with a “one setting fits all” screen.
For DIY-focused golfers, the combination of a thoughtfully engineered kit, tunable impact screen system, and room-friendly enclosure makes this setup feel far closer to a custom build than a basic package. You get pro-style visuals, better safety, and a frame you can actually assemble and adjust yourself, which is why it stands out as a top DIY enclosure choice for a serious at-home simulator.
|
Pros
|
Cons
|
|---|---|
Other Great DIY Golf Simulator Enclosures
A bit more information from our survey and research.
Best Golf Simulator Enclosure for Small Spaces
Golfers with tight rooms, low ceilings, or multi‑use spaces often assume a simulator is out of reach, but the right enclosure can make even a modest area feel like a dedicated hitting bay. By focusing on compact footprints, smart framing, and carefully managed safety zones, you can fit a full‑screen experience into spaces like single garages, spare bedrooms, or basements without overwhelming the room. In this guide, we’ll look at how to size an enclosure for short ball‑to‑screen distances, control bounceback and shanks in close quarters, and choose materials that keep your setup both safe and comfortable. The goal is to help you design a small‑space enclosure that feels immersive when you’re playing, then disappears as much as possible when you’re not.
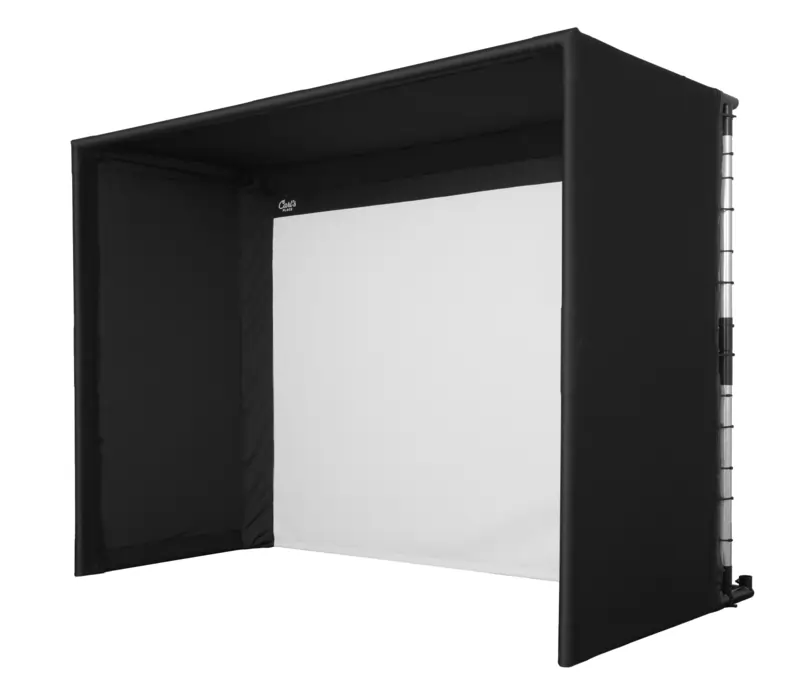
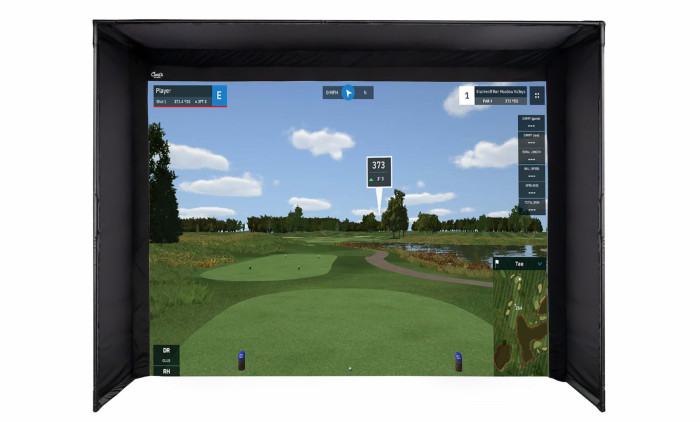
Sig 8 Golf Simulator Enclosure
The SIG8 Golf Simulator Enclosure shines in small spaces because it’s purpose-built around a compact footprint without feeling cramped at address. Its tighter frame and 8-foot-wide screen let you create a true, full-screen simulator experience in rooms where a SIG10 or larger bay simply won’t fit, so apartment golfers, single-bay garages, and short-wall basements can finally get a “real” studio instead of a compromise net. That smaller size also makes projector placement and cable routing easier, which is a big help when you’re trying to keep a modest room from looking like a science project.
A major benefit for everyday golfers is how “plug-and-play” the SIG8 feels compared with DIY builds. The pre-engineered frame, pre-cut components, and tailored impact screen remove a ton of guesswork around sizing and squaring the enclosure, which means you spend less time tinkering and more time hitting balls. Everything is designed to go together in a predictable way, so even if you’re not handy, you can get to a solid, safe hitting bay without needing to design your own structure from scratch.
The enclosure also leans heavily into safety and comfort, which matters even more in a tight room. Its impact screen is built to handle driver swing speeds while keeping noise and bounceback manageable, key when you’re standing close to the screen and may have family or neighbors on the other side of a wall. Paired with side and top protection, the SIG8 gives you confidence to swing freely with longer clubs in a small footprint, because toe strikes and thin bullets are still contained inside the bay instead of ricocheting into furniture or drywall.
All of this makes the SIG8 a standout small-space enclosure: it brings a polished, “studio” look and dependable performance into rooms where most premium enclosures are simply too big. You get a professional-feeling screen, a compact but secure hitting area, and an easier path from bare room to finished sim—all tailored to golfers who can’t dedicate a massive space but still want a top-tier experience.
|
Pros
|
Cons
|
|---|---|
Golf Simulator Enclosure Feature Comparisons
| ENCLOSURE | SIZES AVAILABLE | PRICE RANGE | PIPE DIAMETER | RETRACTABLE | OPTIONAL ACCESSORIES | WARRANTY | SHIPPING | RATING |
|---|---|---|---|---|---|---|---|---|
| Carl’s Place DIY Enclosure | Standard (8×10.5 to 10×15.5) & Custom | $999 – $1,800+ | 1-inch EMT | No | Net wall extensions, foam inserts, safety baffles, back cover | 30-day returns (standard items) | Free no-rush (contiguous US) | 4.8/5 (22 reviews) |
| Carl’s Place Pro Enclosure | Up to 20ft wide / 20ft deep (Custom) | $3,400 – $5,000+ | 2-inch EMT | No | Ceiling crossbar, premium impact screen upgrades, foam inserts | 30-day returns (standard items) | Freight calculated at checkout | 4.8/5 (22 reviews) |
| Shop Indoor Golf SIG Series | SIG8, SIG10, SIG12 | $1,799 – $3,500+ | Proprietary push-pin frame | No | Side barrier netting, landing pads, blackout screens | Not specified in current data | Free shipping | 4.4 – 4.6/5 (Varies by model) |
| SportScreen Vanish | 9ft, 11ft, 13ft, 16ft Wide | $2,399 – $4,399 | N/A (Roll-up tube) | Yes (Hand crank or Motorized) | Side screens, ceiling panel, baffles (included in kits) | 2 years (defects) | Calculated at checkout | 4.3/5 (18 reviews) |
Types of Golf Simulator Enclosures
Fixed Frame Enclosures
Fixed frame systems use a rigid pipe or aluminum structure that stays up all the time. They are the safest, quietest, and most visually polished option when you have a dedicated room.
Common traits:
- 5‑foot depth or more.
- Full wrap of black nylon or polyester.
- Triple‑layer or premium impact screen.
- Foam or padding around exposed frame members.
These are what you see in most commercial studios and serious home builds.
Retractable Enclosures
Retractable designs mount to the wall or ceiling and roll up when you’re done. They trade a bit of rigidity for the ability to reclaim your garage or living room.
Key traits:
- Screen and side panels roll into a cassette or curtain box.
- Depth is often “virtual” (screen to car bumper) rather than a hard frame.
- Best models add a rear support membrane to knock down bounce‑back and noise.
Retractable is the right call if your sim lives in a multipurpose space and your car still needs a home.
DIY Pipe‑Frame Enclosures
DIY enclosures use EMT conduit or similar pipe with a custom screen and soft goods. When done right, they can be just as safe as a pre‑built kit, and much cheaper. When done wrong—too shallow, no side curtains, over‑tight screen—they create the worst bounce‑back of all.
A good DIY build still follows the same rules:
- 5‑foot frame depth.
- Full‑height side curtains.
- At least 8–12 inches of dead space behind the screen.
- Screen mounted with bungees or releasable ties so it can “give,” not drum.
Impact Screens Inside the Enclosures
The frame is the skeleton. The impact screen is the organ that actually takes the beating.
How Screen Construction Affects Safety
At indoor ball speeds, the ball has three jobs for your screen:
- Penetrate slightly and stretch the fabric.
- Transfer energy to the weave and any backing layers.
- Drop straight down without ricocheting.
Triple‑layer “spacer mesh” constructions like SIG’s premium screen and Carl’s Premium are designed exactly for this. The front layer manages image quality, the middle layer acts as a shock absorber, and the rear layer controls noise and light bleed.
Single‑layer or looser‑weave screens can still be safe, but only if:
- You keep at least 10–12 feet from ball to screen.
- You give the screen slack with bungees.
- You leave enough air space behind it.
If you’re forced closer to the screen—garage builds often end up at 8–9 feet—go with a premium or triple‑layer screen. It’s more forgiving at higher ball speeds and steeper attack angles.
Recommended Enclosure + Screen Pairings
Here’s a quick view of how the major enclosures and screens in your list play together for safety, bounce‑back control, and shank protection.
| Use Case | Enclosure | Depth | Style | Best Screen Pairing | Why It Works |
|---|---|---|---|---|---|
| Dedicated sim room, mid‑budget | Carl’s Place DIY Enclosure | ~5 ft | Fixed | Carl’s Preferred Impact Screen or Carl’s Premium Impact Screen | Full depth, full wrap, easy screen tensioning. |
| High‑end studio or teaching bay | Carl’s Place Professional Enclosure | 5+ ft | Fixed | Carl’s Premium Impact Screen or Carl’s High Contrast Gray Impact Screen | Clean look, great acoustics, better for daily use. |
| Garage with cars still parked | SportScreen Vanish Retractable | Virtual | Retractable | 3‑ply Vanish screen or SIG Premium Impact Screen | Rear membrane and quality fabric tame bounce‑back in tight spaces. |
| Multi‑use family room | SportScreen Retractable style | Virtual | Retractable | SIG Preferred Impact Screen or Ace HiQ Sim Screen | Fast setup/teardown, good image, good shank protection. |
| DIY budget build | Carl’s Place DIY Enclosure + Standard screen | ~5 ft | Fixed DIY | Carl’s Standard Impact Screen | Safe if you keep distance and tension correct, cheaper entry point. |
What is the best golf simulator enclosure for home use?
The “best” enclosure depends on your space and budget. For a high-end, permanent setup, the Carl’s Place Pro Enclosure is widely considered the industry standard for durability and image quality. For those in shared spaces, a motorized option like the SportScreen Vanish offers the best balance of performance and flexibility.
How much space do I need for a golf simulator enclosure?
At a minimum, you need a room that is 10 feet wide, 12 feet deep, and 9 feet high. However, to safely house a full golf simulator enclosure kit and swing a driver comfortably, a width of 12–14 feet and a ceiling height of 10+ feet is recommended. Most enclosures require at least 5 feet of depth to safely absorb ball impact and prevent bounce-back.
What is included in a golf simulator enclosure kit?
A standard kit typically includes a metal frame (often 1-inch or 2-inch EMT pipe), a heavy-duty impact screen, black fabric side walls, and a ceiling panel. Premium kits may also include foam frame padding, ball bungees for screen tensioning, and net extensions for additional shank protection.
Can I install a golf simulator enclosure outdoors?
Yes, but you must use an outdoor golf simulator enclosure specifically designed with UV-resistant fabrics and rust-proof framing. It is also critical to use a “weighted” impact screen to prevent wind from moving the hitting surface. Most users opt for a retractable or portable net for outdoor use unless they have a covered patio or dedicated outbuilding.
How does a retractable golf simulator enclosure work?
A retractable golf simulator enclosure uses a motorized or manual crank system to roll the impact screen and side curtains up into a ceiling-mounted cassette. This allows you to reclaim your garage or media room space in seconds when the simulator is not in use. Models like the G-Trak or SportScreen are popular for their “vanishing” design.